ILLUSTRATED ACTIVITY GUIDE 01 · ARTS & CRAFTS
Create With Paper & Cardboard
Make a little town, a talking puppet, and an adventure map using ordinary paper supplies.
Choose an activity ↓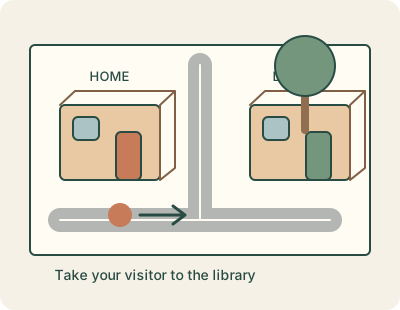
How to use this guide
This guide is for a parent, caregiver, or educator making things alongside a child. Each project becomes something you can play with afterward. Choose one project, gather its materials, and read the steps together. Your version can look different from the example.
Your role as the adult
Help prepare the workspace and handle any tricky folds. Let your child choose the colors, names, and story. These projects do not require cutting; use whole sheets and draw the details instead.
What you’ll explore
Drawing, arranging materials, planning a simple project, and explaining an idea.
ACTIVITY 1 · 20–30 minutes
Make a paper-and-box town
A small town on a paper map, ready for a pretend visitor to explore.
What you’ll need
- Two sheets of paper, or one large piece of clean cardboard
- Crayons or washable markers
- Two or three clean, small empty boxes, such as tissue boxes
- Optional: tape and a large toy figure
Before you start: An adult checks the boxes for staples, sharp edges, and loose packaging. Put the paper on a flat surface; tape sheets together if you want a larger map.
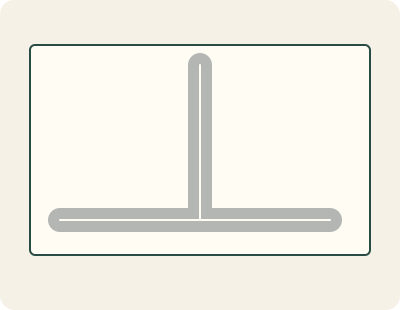
1. Draw a road on a sheet of paper.
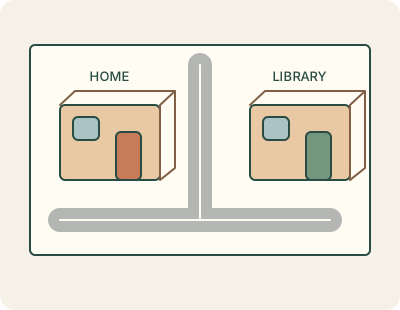
2. Use two empty boxes as buildings.
3. Move a visitor between the places.
What to do together
Draw one road
Ask your child where a visitor should travel. Draw a wide road across the paper. Add a second road if you like, leaving space beside it for buildings. A winding line works just as well as a straight one.
Choose two places
Set two boxes beside the road. Decide together what they will be: perhaps a home and a bakery, or a library and a pet shop. If you have no boxes, draw the buildings directly on the map.
Give the town its details
Draw a door and windows on each box, or draw them on paper and tape the paper to the box. Add signs, trees, a park, or a place to cross the road. Your child can tell you what to write on a sign.
Take a visitor around
Use a large toy figure or your finger as a visitor. Start at one building and travel along the road to another. Ask your child to explain what happens when the visitor arrives.
Add a reason to return
Invent a small task: deliver a letter, buy a pretend loaf of bread, or meet a friend at the park. Let your child add a place the visitor needs. Leave the town assembled if you want to play again later.
Things you can say
- “Which building should we make first?”
- “How will our visitor get from home to the library?”
Make it simpler
Use one sheet and draw just a home, a park, and a road. You can do the drawing while your child chooses the places.
Take it further
Add two routes to the same place. Ask your child to describe each route using words such as beside, between, and around.
ACTIVITY 2 · 15–20 minutes
Make a talking paper-bag puppet
A hand puppet with a mouth you can open while giving it a voice.
What you’ll need
- One clean paper lunch bag per puppet
- Crayons or washable markers
- A flat surface for drawing
Before you start: Use a small paper lunch bag, never a plastic bag. Lay it flat with the folded rectangular bottom facing upward and the open end toward you. The rectangular flap will become the face.
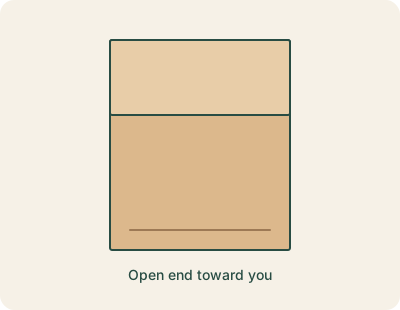
1. Put the folded bottom of the bag facing up.
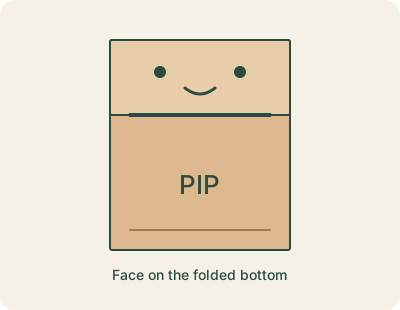
2. Draw the face on the flap and the mouth underneath.
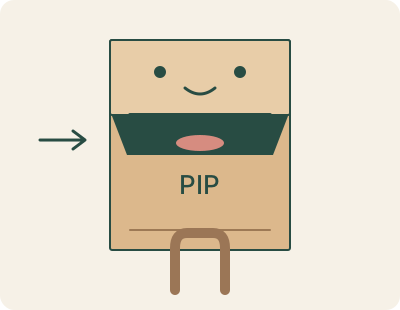
3. Place your hand inside and gently move the flap.
What to do together
Find the moving flap
Lift the folded bottom gently, then lay it down again. Show your child that this flap can move. Keep decorations drawn on the bag so there are no small attached pieces.
Draw a face
Draw eyes and a nose on the rectangular flap. Put the upper lip along its bottom edge. Lift the flap and draw a tongue or the inside of the mouth in the space underneath.
Add a body and a name
Use the long part of the bag for clothes, fur, or a colorful pattern. Choose a name and one thing your character likes. It can be an animal, a person, or an invented creature.
Try making it talk
Slide one hand into the open end. Place your fingers behind the bottom flap and your thumb below it. Gently open and close your hand to move the mouth. An adult can demonstrate or hold the puppet if the bag is too large for the child.
Have a short conversation
Let the puppet introduce itself. Ask it one question, then invite your child to answer in its voice. Swap roles or make a second puppet for a conversation.
Things you can say
- “What would your puppet like to tell us?”
- “Does it have a quiet voice, a squeaky voice, or your own voice?”
Make it simpler
Draw a face on an ordinary sheet of paper and hold it up. Your child can choose its words while you move it.
Take it further
Give two puppets a small problem, such as deciding what to pack for a picnic. Take turns helping them find an answer.
ACTIVITY 3 · 15–25 minutes
Draw an adventure map
A map with a starting place, three landmarks, and a destination for an imaginary journey.
What you’ll need
- A sheet of paper
- Crayons or washable markers
Before you start: Choose a comfortable place to draw. Explain that this is an invented map: you can put a forest next to a moon station if you want.
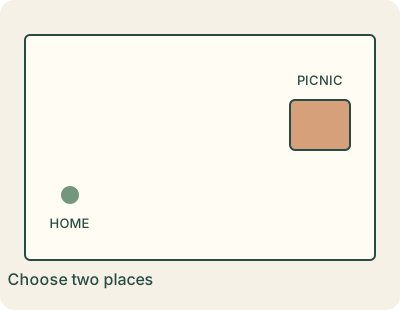
1. Mark a starting place and a destination.
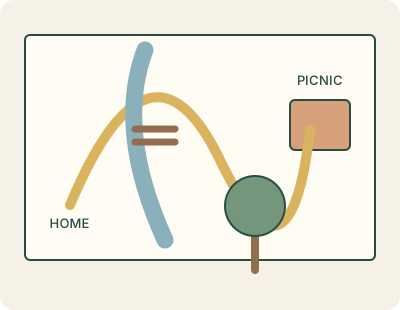
2. Connect them with a path and landmarks.
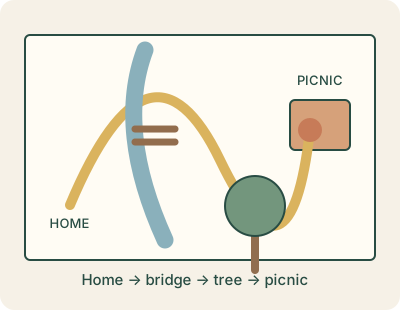
3. Trace the route while telling your adventure.
What to do together
Choose a beginning and an ending
Mark a starting place on one side of the paper and a destination on the other. Draw simple pictures, such as a house at the start and a picnic blanket at the end.
Draw a path
Connect the two places with a line. Let it turn or loop around the paper. Trace it with your finger to check that you can follow it from start to finish.
Add three landmarks
Put something beside the path at three points: a bridge, a tall tree, and a cave, for example. Draw a simple symbol for each and say what it represents. An adult can add labels.
Tell the journey
Move your finger along the path while telling what happens. Stop at each landmark and let your child add an event: “At the bridge, we meet…” Keep taking turns until you reach the destination.
Things you can say
- “What will we find when we reach this place?”
- “What happened first? What comes next?”
Make it simpler
Draw a line between two places and add one landmark. Your child can point while you describe the journey.
Take it further
Draw a fork in the path. Tell a different adventure depending on which route you choose.
Stay Playful Project · https://stayplayfulproject.org/play-and-learn/create-with-paper-and-cardboard/